Hair in photos is serious business. One bad hair day can destroy an otherwise perfect shot.
But you cannot have perfect hair in every picture, can you?
There are party photos where your hair is messy after a drink or two, or travel photos where the wind blows your hair everywhere, or gym photos where your hair is sweaty and flat.
So what do you do? Obviously, hair editing.
Hair editing means fixing the hair in a photo using editing tools or AI. You can change color, style, length, volume, shine, or even fix small problems like frizz.
In this blog, we will cover how to edit hair in photos to perfection — and I mean it.
Life is not perfect, but your hair can be 😉
Types of hair editing
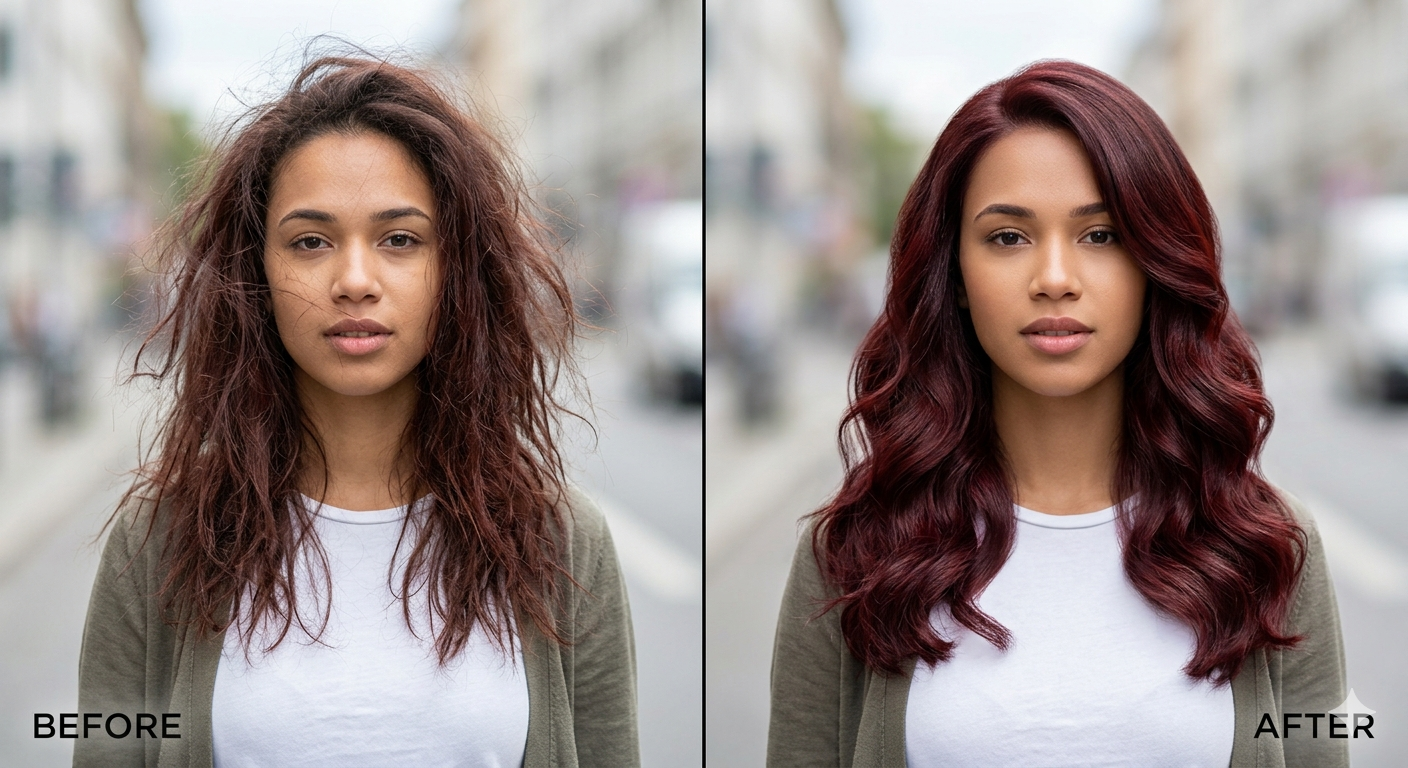
4-way grid showing hair color change, frizz removal close-up, a short bob cut, and a volume boost on the same model.
Hair editing is not one-size-fits-all. There are different types of editing, like:
- Change the hair color
- Hairstyle changes
- Hair length editing
- Add Hair volume and thickness
- Frizz and flyaway removal
- Add shine to hair
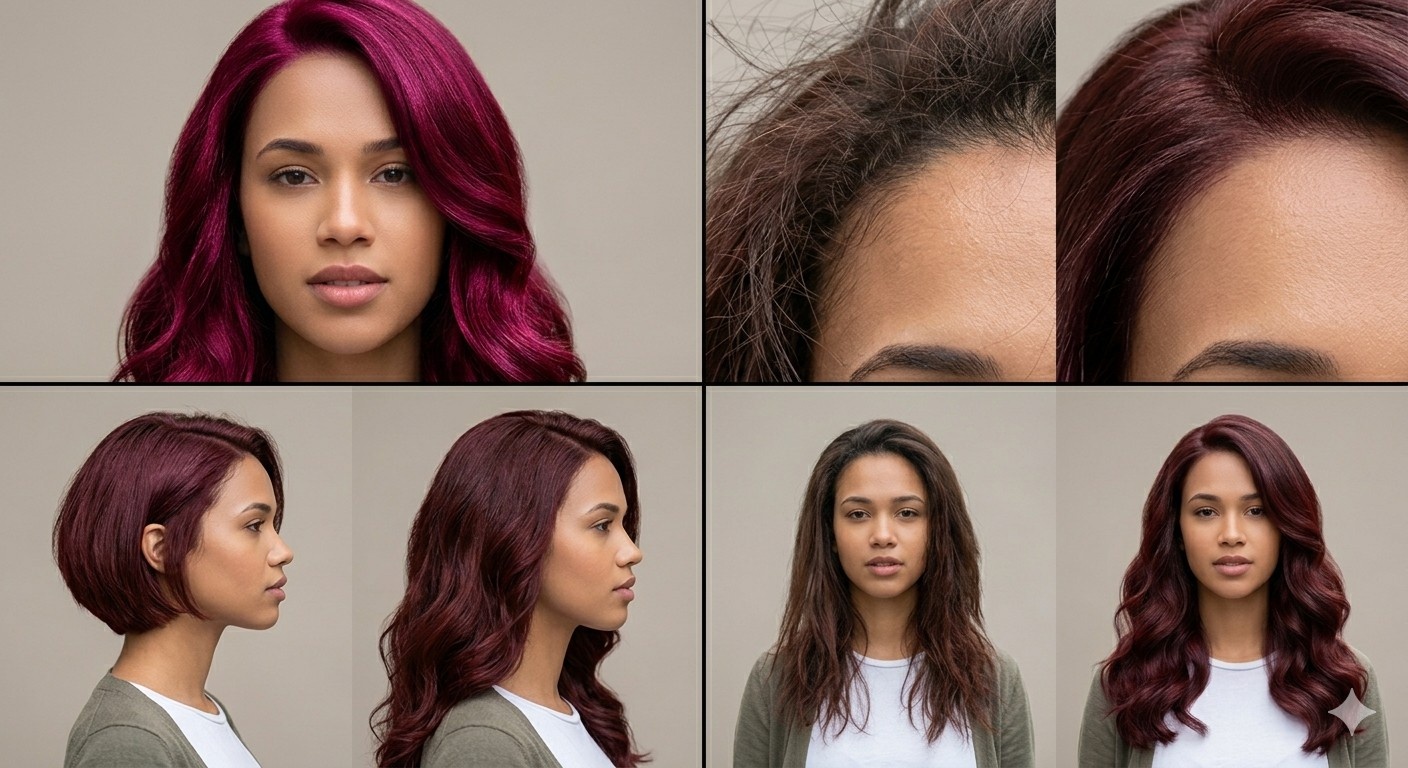
- Hairline correction or bald spot filling
- Add or remove bangs from the forehead
Don’t be overwhelmed. You do not need to learn many tools to perform each edit.
How to edit hair using AI
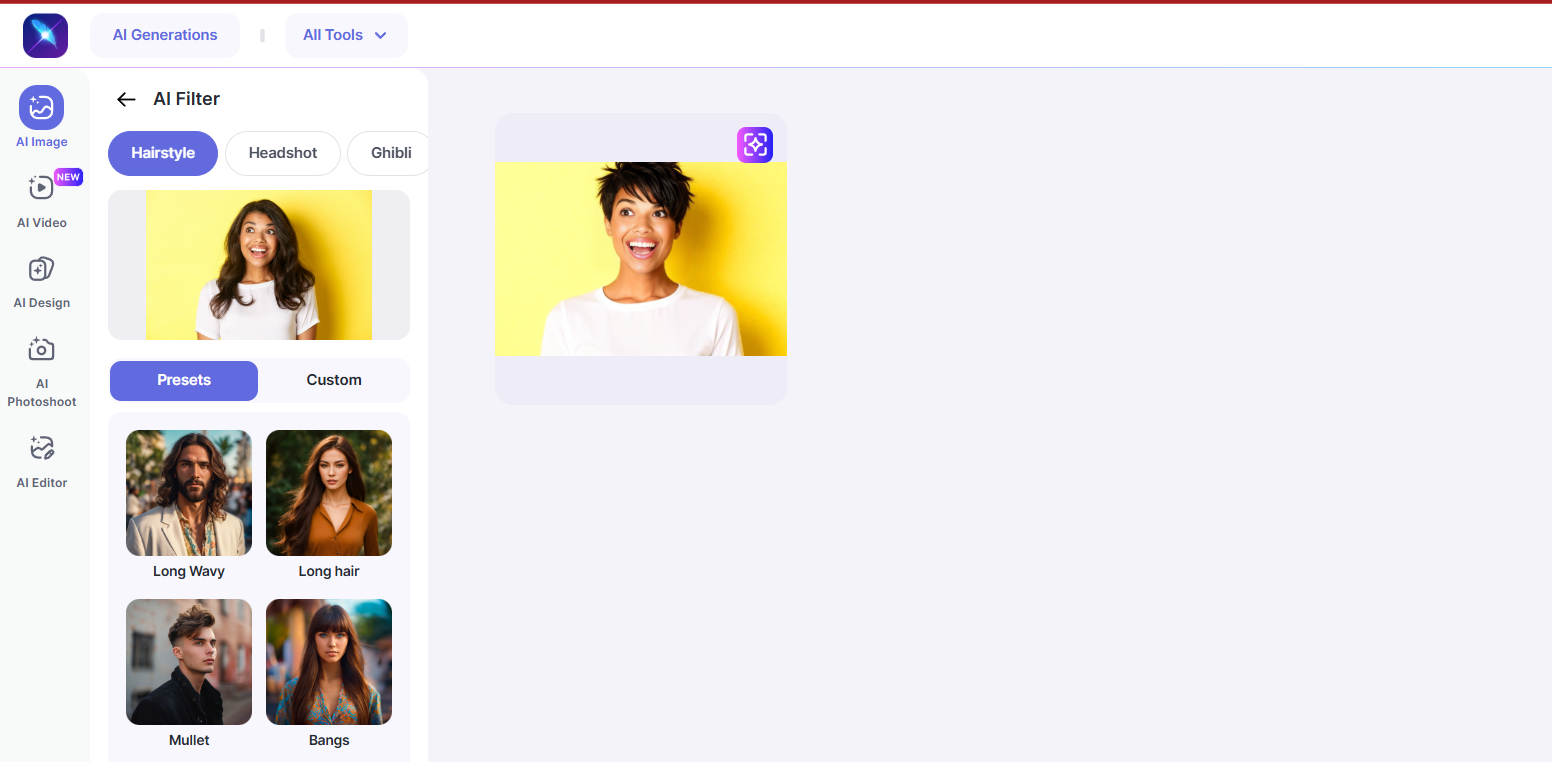
Using Presets
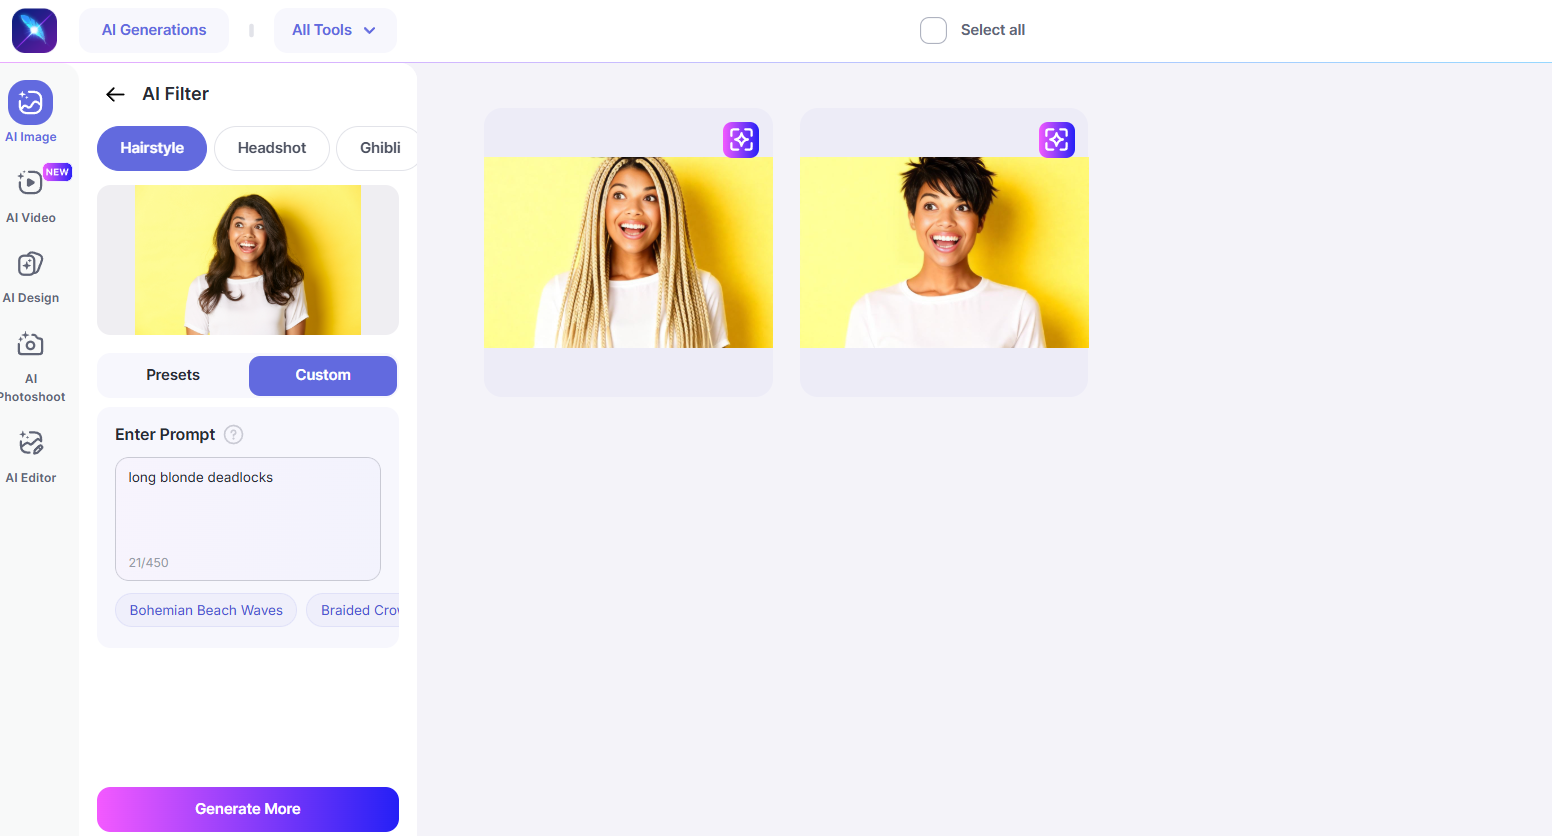
Using Prompts
AI tools use automatic detection and segmentation. They detect the hair region using deep learning models. Some tools generate new hairstyles hyper-realistically using generative models.
With tools like lightX, it is fast. One click and boom.
Good for beginners. Good for quick edits. And very realistic.
Adobe Photoshop is by far the most used software for hair editing. And editing hair in Photoshop is all about control and precision. Let’s start from the very beginning
-
Go to the website
Download the app for iOS or Android
-
Launch LightX
Open Adobe Creative Cloud.
Click Open next to Photoshop OR Search “Photoshop” in your computer search bar and open it directly.
-
Open your photo
Click File > Open.
Select your image.
Click Open.
Now your image is ready for editing.
-
Hair editing step by step
Once your image is uploaded, you can easily edit and enhance your hair using a range of AI tools. Whether you want to try a new hairstyle, adjust the hairline, change hair color, add volume, or remove frizz and flyaways, everything can be done in one place.
Step 1: Upload your photo in JPEG or PNG format.
Step 2: Select the hair editing feature or preset based on what you want to change.
Step 3: Click Generate, review the result, and download your edited photo.
Why should you use AI for hair editing?
There are various benefits of using AI instead of manual editing. Using AI is faster and easier than manual editing. You can do everything in seconds, like changing hair colour, trying new hairstyles, adjusting the hairline, removing frizz, or anything. You don’t need to be experienced to use an AI tool. It takes no effort, no time, and no money. It can do all :
- Automatic hair detection: AI finds the hair area by itself.
- Saves time: Edits that take minutes manually can be done in seconds.
- Beginner-friendly: No advanced editing skills are needed.
- Multiple edits quickly: You can try different hair colors or styles easily.
- Natural-looking results: AI keeps the texture and lighting balanced.
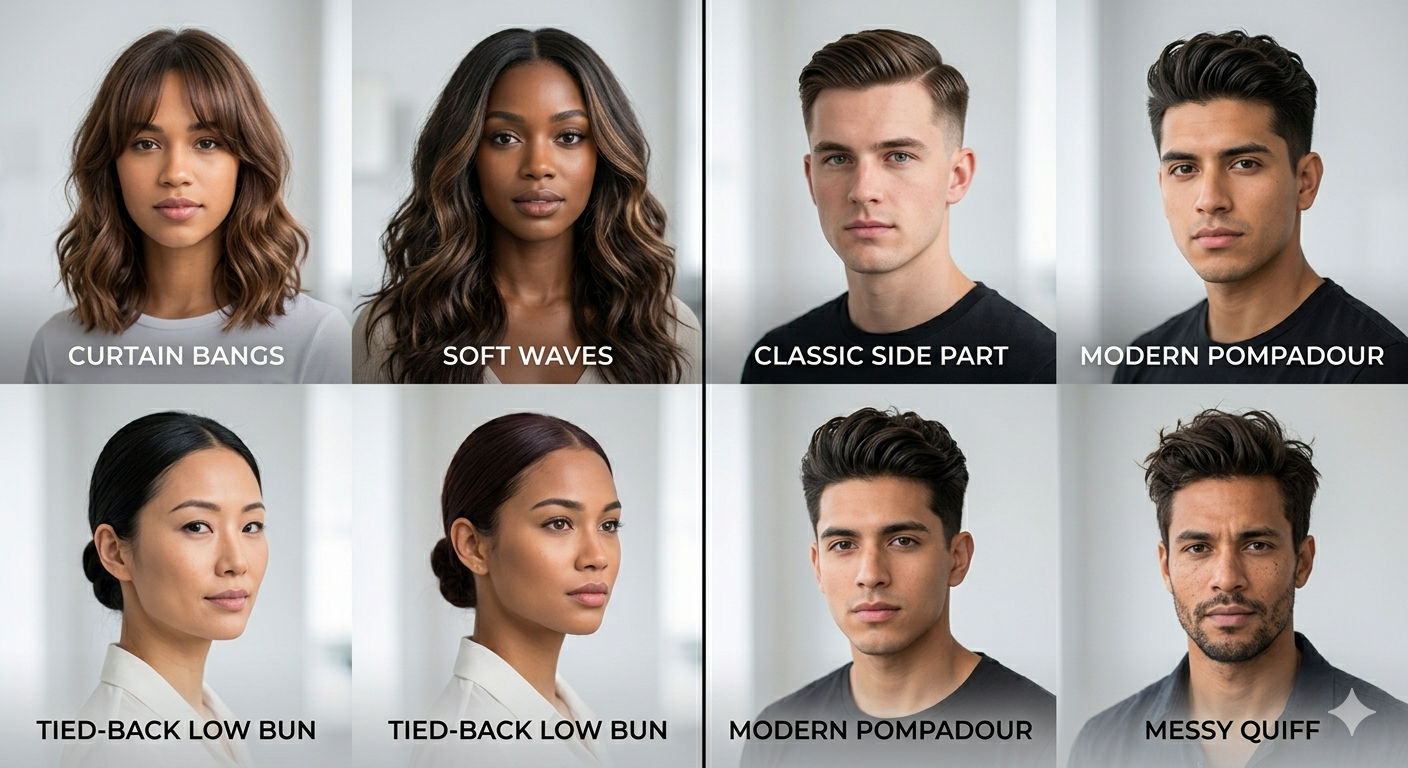
Hairstyle types for different use cases
Here is a clear and structured table categorizing hairstyle types by use cases for men and women.
| Use Cases | Men’s Hairstyle Types | Women’s Hairstyle Types |
| Social Media Photos | Textured crop, messy quiff, fade with styled top, curtain haircut | Soft waves, curtain bangs, layered hair, high ponytail |
| Professional / LinkedIn Photos | Classic side part, short taper cut, neat comb-over, crew cut | Sleek straight hair, low bun, soft layers, shoulder-length blowout |
| Modeling / Portfolio | Undercut, modern pompadour, styled quiff, medium layered hair | Beach waves, voluminous curls, sleek long hair, and an editorial bun |
| ID / Passport Photos | Short, neat haircut, crew cut, classic taper, natural short hair | Straight natural hair, low ponytail, simple shoulder-length hair, tied-back hair |
| Dating Profile Photos | Messy textured hair, mid fade with volume, casual swept-back hair | Loose waves, side-parted hair, soft curls, layered hair |
| Gym / Fitness Photos | Short buzz cut, fade haircut, short textured hair | High ponytail, braided ponytail, tight bun |
| Creative / Fashion Photos | Long textured hair, colored fade, messy layered hair | Bold curls, colored hair, shag cut, edgy layered hair |
| Corporate Team Photos | Classic taper cut, neat side part, clean short haircut | Straight hair with a side part, a low bun, or neat medium-length hair |
Final thoughts
Hair editing is useful when the photo needs refinement. It is not for changing your whole identity every time.
Use manual editing when you need precision. Use AI when you need speed. Best results often come from combining both.
Realism matters. Moderation matters. Tool choice matters.
If the hair looks natural, nobody talks about it.
If it looks fake, that is the only thing people see.
FAQs
1. Can AI add new hair or fix bald spots in a photo?
Yes. AI tools can add natural-looking hair and help cover bald spots or thinning areas in a photo.
2. Does AI hair editing look realistic?
Yes, good AI tools always maintain the texture, lighting, and shadow to give a real & natural look.
3. Can I edit hair in old or low-quality photos?
Yes. You can edit hair in old or low-quality photos, but clearer images usually give better results.
4. Is hair editing allowed for professional photography?
Yes, it is allowed to fix small issues like flyaways, frizz, or hair volume in a picture.
5. How can I change my hair color in a photo?
You just need to upload your single photo, choose a hair color option, and then click to generate it. AI will apply a new color automatically.
6. How can I add volume to thin hair in photos?
Use a hair volume feature. The tool will make the hair look fuller and thicker while keeping it natural.