Aesthetic photos are always trending.
Whether it’s the ChatGPT Ghibli trend or the Gemini AI retro trend, there will always be new ones coming and going. But did you know that ChatGPT or any image generator can be used for more than just trends?
Today, in this blog, I’ll be sharing some unique ChatGPT photo editing prompts that you can use to edit selfies creatively. Simply copy and paste these prompt ideas, and you’re good to go.
These prompts will be super detailed, like next-level detailed, so be ready to feel like a pro editor!
I’ll also share some prompt tips that will help you in creating prompts of your own.
How to edit photos on ChatGPT?
Start a chat: Open a new conversation in ChatGPT and upload the image you want to edit.
Enter prompt: Describe the changes you want to make.
Generate: Wait for the image to process, and ChatGPT will make the changes or generate a new image depending on your prompt.
Refine: If you’re not satisfied, you can continue the conversation with more instructions to generate what you want.
Download: Once satisfied, download the image to your device.
25 ChatGPT prompts for unique photo edits
Gone are the days when you had to work too much manually to make even small changes in a photo.
All you have to do is prompt the AI; Yes! Even for photo editing.
AI is not only convenient but also more precise than manual editing.
Here are some very underrated photo editing ideas and prompts that you can try:
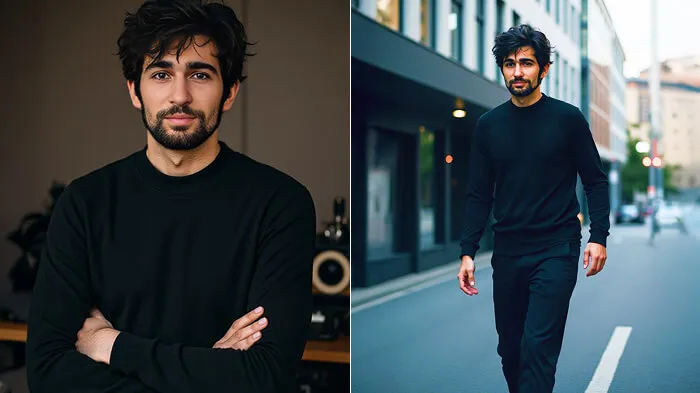
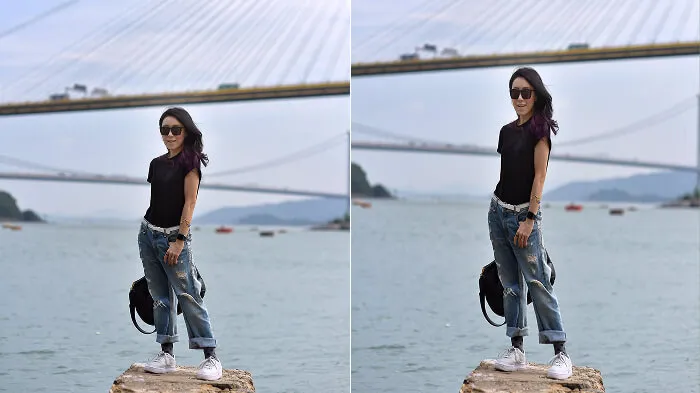
Change hair, outfits, and backgrounds
It’s like a full-blown AI photoshoot. No need to get outfits, go to places, or style hair. Everything happens realistically here. You can generate virtual outfits, hair, and backgrounds without looking edited or fake. Try looks like:
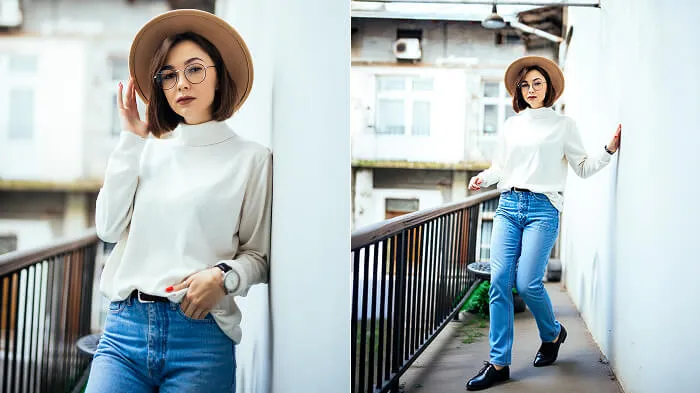
- Old money look
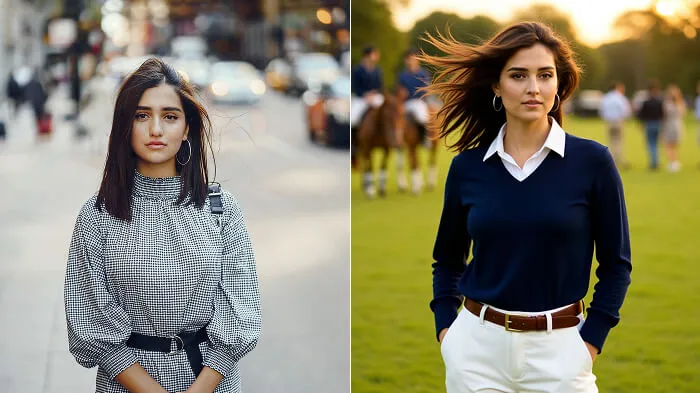
Prompt: “Shoulder-length straight hair with middle part, flowing to the right as if wind blows from the left, navy-blue cashmere crewneck sweater over white button-down shirt, trousers with loafers, polo field background with horses playing, spectators in attire, cars at field edge, light coming from the right.”
- Celebrity look
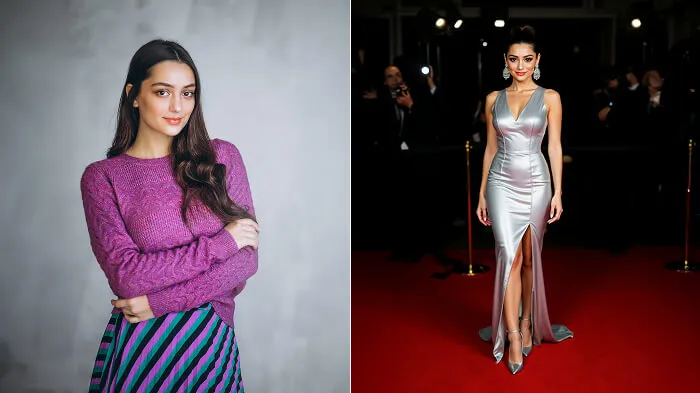
Prompt: “High glossy ponytail inspired by Ariana Grande, tight and smooth with a few loose strands blowing right as wind comes from the left, metallic silver couture gown inspired by Zendaya’s 2019 Met Gala look with corset bodice, side slit, and shimmering fabric, paired with pointed silver heels and chandelier earrings, red carpet event background with branded media wall, velvet rope barriers, and camera flashes, bright front key light, side fill lights, and slight vignette for subject focus.”
- Modern luxury
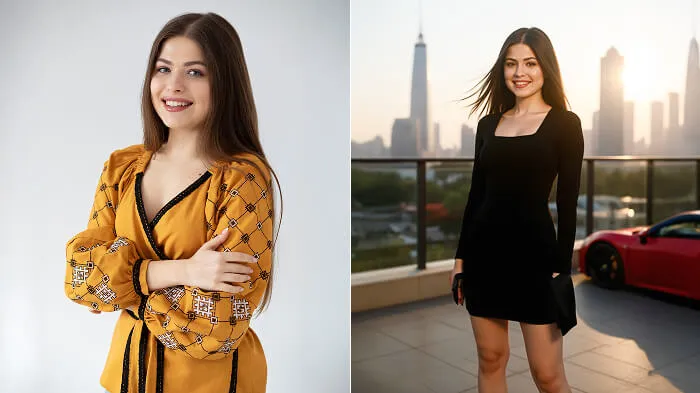
Prompt: “Straight shoulder-length hair blowing slightly right as wind comes from the left, black bodycon dress with square neckline, long sleeves, and defined waist, pointed stiletto heels, minimalist clutch, rooftop terrace background overlooking Dubai skyline with Burj Khalifa, glass buildings, and red Ferrari nearby, warm sunlight from behind, front fill light, shallow depth of field with slightly blurred background.”
- Soft French Riviera aesthetic
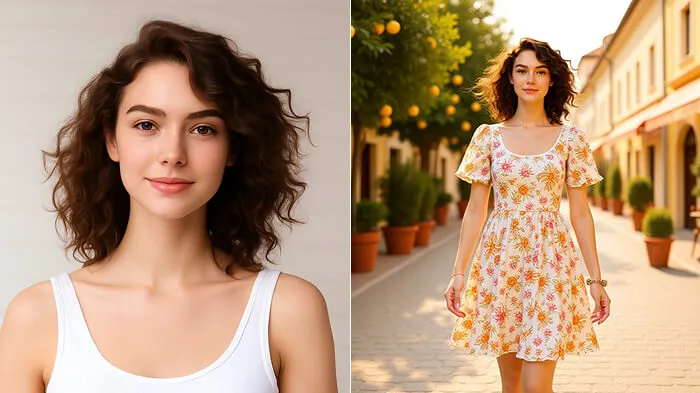
Prompt: “Loose wavy hair blowing gently right as wind comes from the left, retro floral midi dress with puff sleeves, fitted waist, and back bow, simple sandals, delicate accessories, French Riviera street background with lemon trees in pots, outdoor café tables and chairs, pastel buildings, warm sunlight from the right, soft shadows, shallow depth of field for dreamy look.”
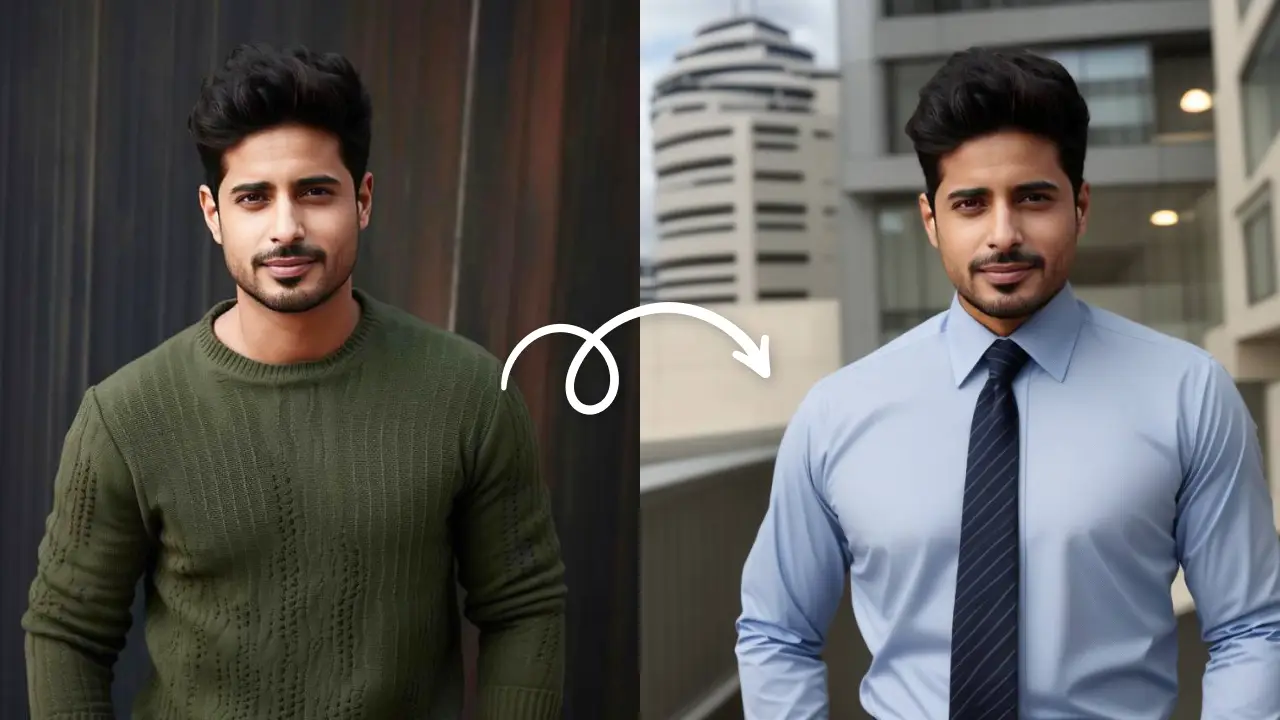
- Professional headshots
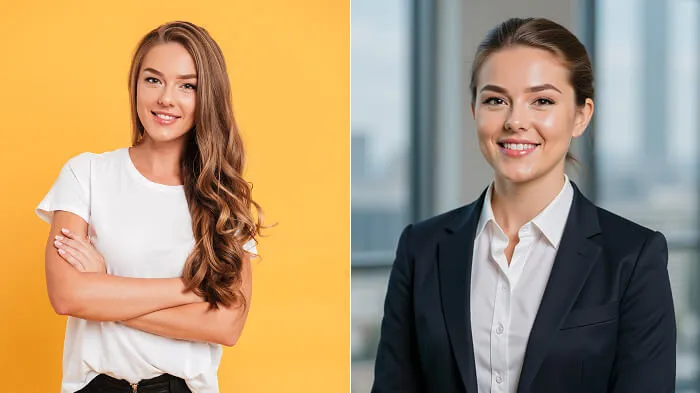
Prompt: “Low bun with side part, neat and smooth for a clean formal look, charcoal blazer over white blouse with minimal accessories, modern office background with large windows and neutral walls, softly blurred background with shallow depth of field, diffused natural light from front-left, white balance at 5600K, even exposure across face for clear headshot.”
Note: Make the changes as needed in the prompt for girl, boy, or couple edits.
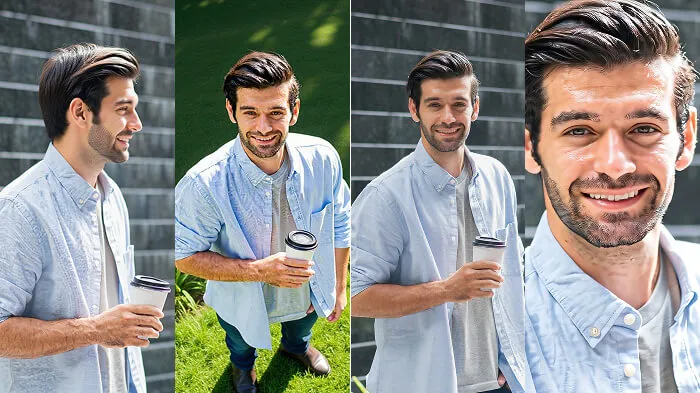
Change pose, lighting, and angles
AI is advancing so much that it’s no longer just about simple photo touch-ups. A single image can now be changed completely, including the pose, facial expressions, lighting, and even the camera angle it was originally taken from.
- Studio-style
Prompt: “Standing straight pose, relaxed shoulders, chin slightly lifted, eyes looking into camera, soft key light front-left, fill light right side to reduce shadows, backlight for separation, camera at eye level, centered waist-up mid-shot, plain neutral background with slight gradient, exposure 1/125 shutter speed, f/4 aperture for sharp clarity.”
- Action shots
Prompt: “mid-motion walking or turning pose, arms and legs slightly bent, strong directional key light from left for dramatic shadows, cool rim light from behind to highlight edges, low camera angle (20–30° below eye level) for powerful look, shutter speed 1/500 to freeze motion, slight background motion blur for realism, city street or open outdoor space background”
- Fashion poses
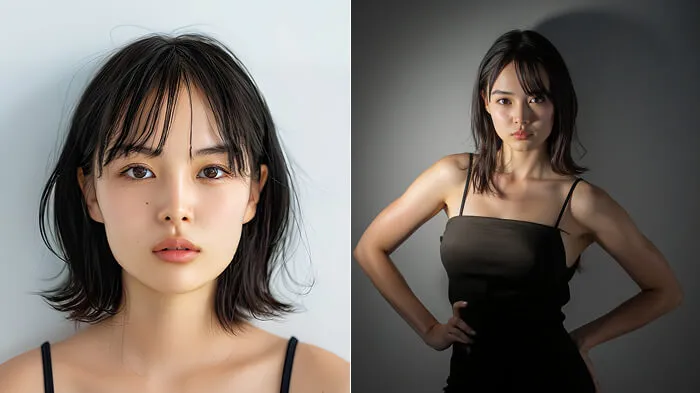
Prompt: “leaning back slightly, one hand on hip other near face, natural spine curve for smooth body flow, strong spotlight top-left for high-contrast shadows, dim fill light right side for face detail, three-quarter side angle (~45°) slightly below eye level for longer body and fashion look, minimalist studio or textured wall background, aperture f/2.8 for shallow depth and soft blurred background.”
- Lifestyle shots
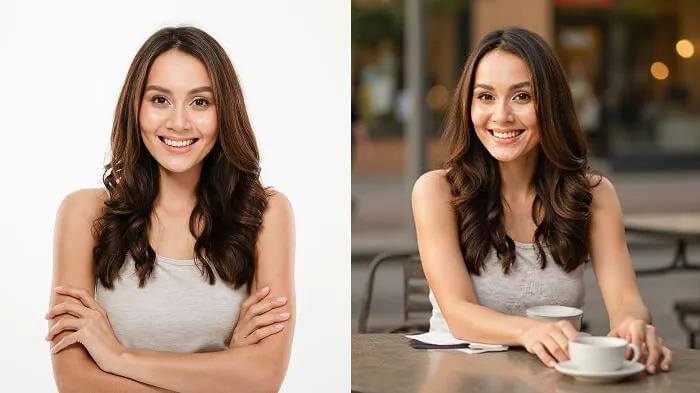
Prompt: “seated sideways at small outdoor café table, one arm resting on table, other holding cup, head turned slightly toward camera, natural diffused daylight from window or overcast sky, soft even light no harsh shadows, camera slightly above eye level (10–15°), casual candid look, aperture f/2.2–f/2.8 for soft blur, ISO 100–200 clean tones, blurred café street background with warm natural colors”
- Cinematic close-ups
Prompt: “looking slightly downward and to the side, eyes partly visible for emotion, soft key light top-left for dramatic contrast and depth, low fill light opposite side to keep shadow details, tight close-up from 45° angle for storytelling look, wide aperture f/1.8–f/2.0 for shallow depth and strong focus, background blurred city lights or textured wall with bokeh effect.”
Change photo aesthetics and style transfer
This might be one of the most popular in generative AI photo editing. New trends are always created using this technique.
You probably have turned your photo into a cartoon or a painting at least once. But what if I told you there’s a lot more to it?

Prompt: “standing against concrete wall with worn grunge texture, height chart visible behind, shoulders square and relaxed, chin slightly raised, eyes straight at camera with neutral or defiant look, plain white or grey t-shirt under wrinkled denim or leather jacket, faint dark circles and slightly messy hair for arrested style, flat key light at eye level minimal shadows for harsh look, cool backlight 5600K from behind for separation, camera eye level chest-up mid-shot, sharp background minimal blur for mugshot effect, muted desaturated color tone with high clarity and slight vignette for authentic booking photo”
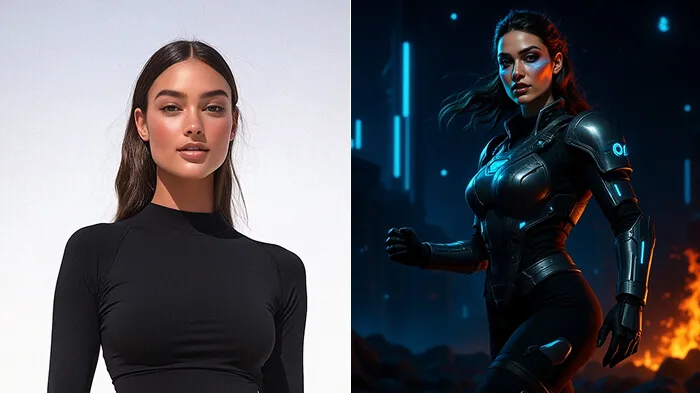
Prompt: “dynamic pose with one leg forward and shoulders turned, eyes focused past camera, strong determined look, detailed sci-fi or fantasy armor or costume, glowing accents layered textures complex patterns, hair styled spiked braided or flowing, bold makeup with contouring metallic eyeshadow and eyeliner, background digital battlefield or futuristic city skyline with neon signs and floating particles, strong key light from left for shadows, blue rim light from behind for separation, warm fill light front-right for balance, low camera angle (15–20° below eye level), high-contrast cinematic color grade with deep blacks and bright highlights, poster-style finish”
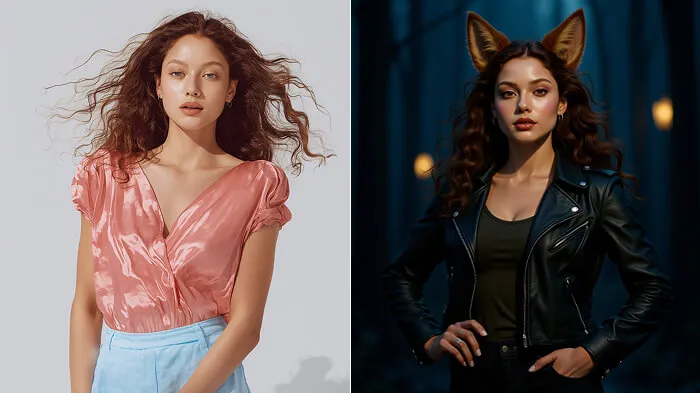
Prompt: “anthropomorphic animal character blending human and animal features, relaxed confident stance, one hand on hip other by side, casual fantasy outfit with fitted leather jacket soft tunic fingerless gloves slim pants, detailed realistic fur texture expressive eyes subtle facial markings, slight shimmer around eyes and soft blush to match fur color, background enchanted forest or neon-lit alley with mist or light rays, soft golden-hour key light right side for warmth, cool fill light left side for dimension, subtle rim light behind to highlight fur edges, camera straight-on or slight 10° tilt for natural portrait, painterly color filter with soft contrast and gentle saturation for storybook feel”
- Magazine cover

Prompt: “confident stance, one hand on hip other touching face or resting on waist, chin slightly raised eyes straight at camera for bold editorial look, couture outfit like structured blazer dress or flowing silk gown, bold accessories statement earrings or oversized sunglasses, sleek high-fashion hair, glowing makeup with bold eyeliner and strong lip color, minimalist studio background neutral tones or soft gradient, mock magazine headlines and logos, beauty dish front light for soft even lighting, subtle fill light from below to reduce shadows, hair light from above for separation, camera slightly above eye level (~10°) for longer body, clean editorial color grade high contrast bright whites warm tones glossy magazine style”
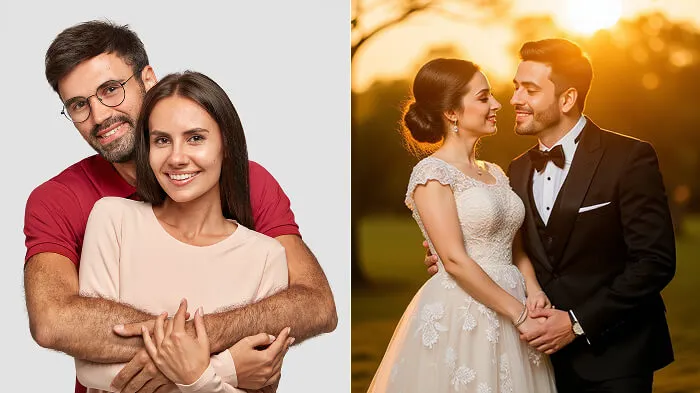
Prompt: “romantic couple pose, hands intertwined or touching foreheads, mid-walk option holding hands, bridal gown with lace and tulle layers, tuxedo or sherwani outfit, soft natural makeup, elegant updo or loose curls, golden-hour garden, floral arches, fairy lights, blurred horizon, warm key light front-left, backlight from setting sun for halo, fill light right side, camera angle slightly below eye level (5–10°), shallow depth (f/2.0–f/2.8), warm film tone, soft highlights, gentle vignette, dreamy wedding style”
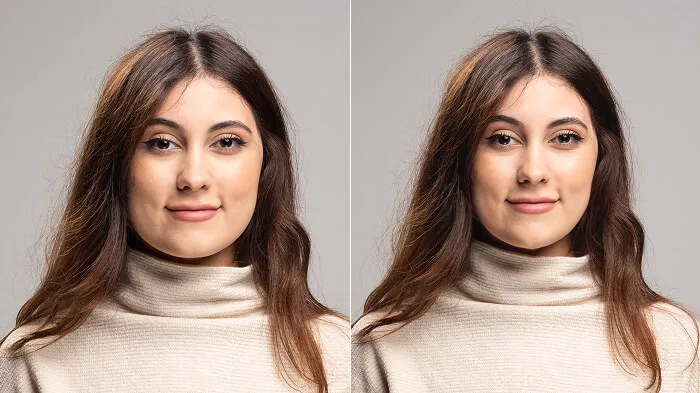
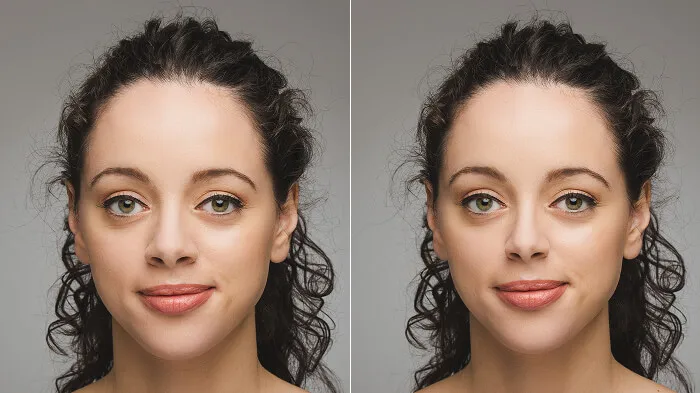
Face and body edits
The best part about editing with AI is that you don’t have to worry about Photoshop fails if you’re not handy with the tool. Just upload and prompt, and ChatGPT can fix the face and body quickly and very naturally, since it uses generative AI to recreate the shape rather than relying on any liquifying tools.
- Open closed eyes
Prompt: “natural open eyes, match original shape size and color, soft catchlights in irises, detailed skin texture and eyelashes, no over-retouching, soft frontal lighting with no harsh shadows, eye-level close-up framing, natural relaxed expression”
- Look tall
Prompt: “extend body proportions slightly for taller elongated look, keep anatomy realistic, lengthen legs and torso subtly without distorting background, standing pose with shoulders back and chin slightly raised for confident posture, camera angle slightly lower (10–15° below eye level) to emphasize height, background with vertical elements like tall windows or trees, soft even front lighting for balanced exposure.”
- Edit jawline
Prompt: “Define and sharpen the jawline subtly for a structured, natural look without over-editing. Maintain skin texture and facial proportions. Add soft shadowing under the jawline for dimension and depth. Lighting: key light from the top-left to enhance contours. Pose: head slightly turned to one side to highlight the jaw structure. Camera angle: eye-level portrait framing with shallow depth of field (f/2.8) to keep focus on the face.”
- Fix nose
Prompt: “Reshape the nose slightly for a balanced and natural appearance while keeping the person’s unique features intact. Smooth any bumps, refine the bridge, and adjust symmetry if needed. Lighting: soft frontal light to evenly illuminate the face and avoid harsh highlights. Pose: straight-on portrait for balanced proportions.
- Slim waist
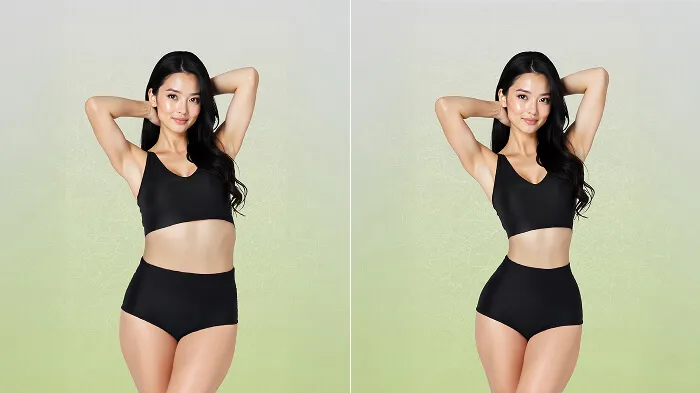
Prompt: “Refine and slim waist slightly, keep body proportions realistic and natural, maintain lighting and clothing texture without warping, standing pose at slight angle one leg forward shoulders back to emphasize shape, camera eye-level full-body shot, soft side light from left for gentle shadows and defined curves, clean uncluttered background to keep focus on subject.”
But in my opinion, prompting for super-specific edits like these is not practical.
Like, if I just want to fix my nose a little or make tiny changes to face or body details, I wouldn’t write long prompts for that.
It’s way easier to just use one-click tools instead. Stuff like body editors can make you look slimmer or taller (or the opposite) in seconds, and you can fix eyes, nose, jawline, or lips quickly too.
Tips to write a prompt for anything
Writing prompts for ChatGPT or any image generator is easy.
Just describe the subject, background, and effects, and you’re done. But when you do only that, the images might feel very bland. What most people miss are the tiny details that unlock a whole new level of quality.
Here are some details that, when mentioned, give your generations a real wow factor:
- Always mention lighting

It’s a very underrated detail, but makes a world of difference. You can mention light in some or all of the following ways:
- Intensity of light – soft, blinding, harsh light
- Direction from where it’s coming – from directly above, from behind the subject
- Source of light – skyscrapers, streetlights, or from the window
- Color of light – neon, pink sunset, fluorescent
Example: “soft golden-hour light from the sunset on the right, giving calming vibe”
This instantly makes images hyperrealistic.
- Specify the camera angle
Most of the time, AI tools are trained to generate images at a certain angle if nothing is mentioned in the prompt, which results in bland, straight portraits. So always make sure that you mention phrases like:
- “shot from a bird’s-eye view”
- “~20° below eye level”
- “side profile”
- “close-up shot” and etc.
- Add pose and expression details
Especially important for action shots, mentioning the subject pose and expressions makes your image very dynamic.
Example: “mid-motion walking pose with arms swinging naturally”
- Background
AI tools take the context of prompts and create backgrounds accordingly. But most of them are usually very generic and cliché. When I say mention backgrounds in the prompt box, I don’t mean the simple ‘add a beach background.’
Backgrounds should have depth, meaning, and a sense of subject-to-background ratio.
Whatever background you want generated, mention tiny details to make it hyperrealistic, like:
- adding a soft or Gaussian blur
- a little bokeh effect
- subtle lighting details
- floating dust particles in the light
Example: Instead of writing “café,” I would write “A vintage café with handwritten chalkboard menus, dusty tables, warm sunlight streaming through the window, a soft bokeh glow, and a slight blur in the background.”
Try this, and you will see a big difference in your image depth.
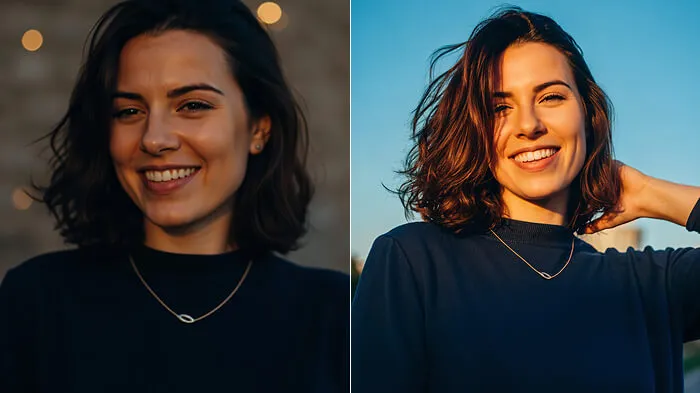
- Photo style
It is used not just for aesthetics but also to make people feel something when they see an image.
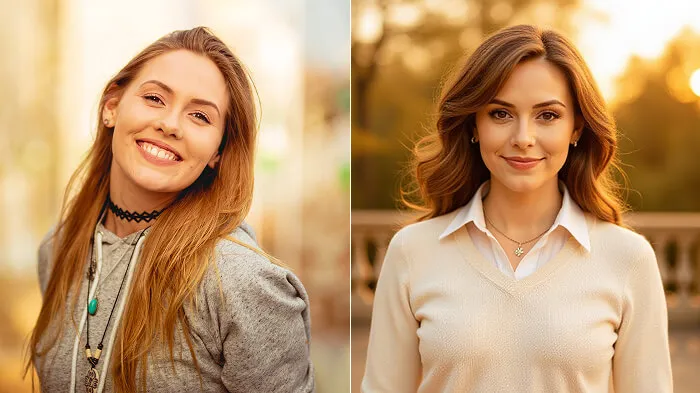
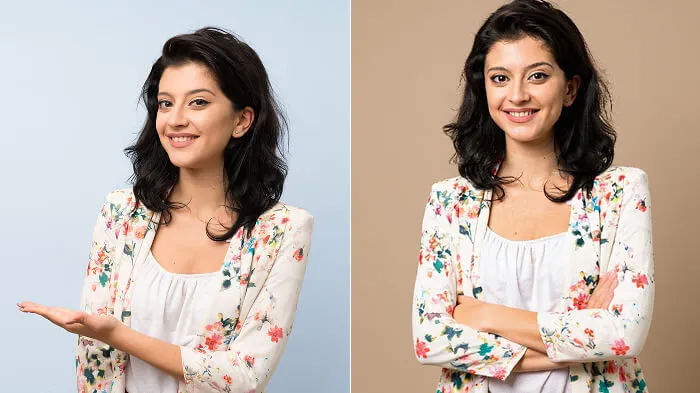
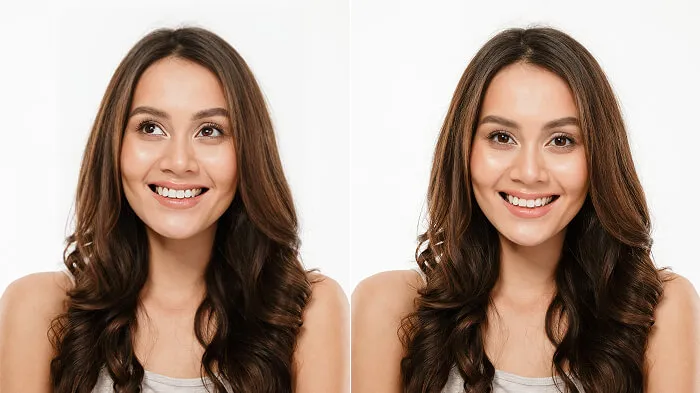
Look at the two above images; both of them were created using the same prompt.
The only difference is that I added “old money aesthetic” in the second prompt, and as you can see, there was a big difference in the overall vibe and how one perceives the image.
- Prompts structure
For AI not to miss any details in your prompt, try to keep the structure as clean as possible by mentioning the details in the following order:
Subject description → Pose and expression → Lighting → Angle → Background → Effects and filter
If long prompts feel tiring, do this instead.
Writing long, detailed prompts can be challenging; besides, not everyone has words to describe everything.
The biggest con of using ChatGPT for generating images is that it is a text-to-text model. It’s not trained for specific image generation, so it feels slow and very dull.
Besides, you need a paid plan like ChatGPT Plus or ChatGPT Pro if you want faster and accurate results.
Other AI image generator tools like LightX are a smarter choice. They’re built for text-to-image tasks, work quickly, and are much easier (and cheaper) to use.
Final thoughts
Start using these prompts, tweak the little details here and there, and you’ll see how even small changes can have a huge impact on generation quality.
The next viral edit might just come from you!