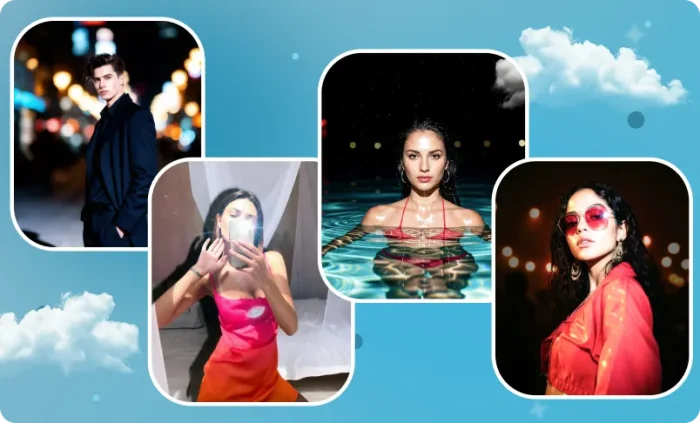
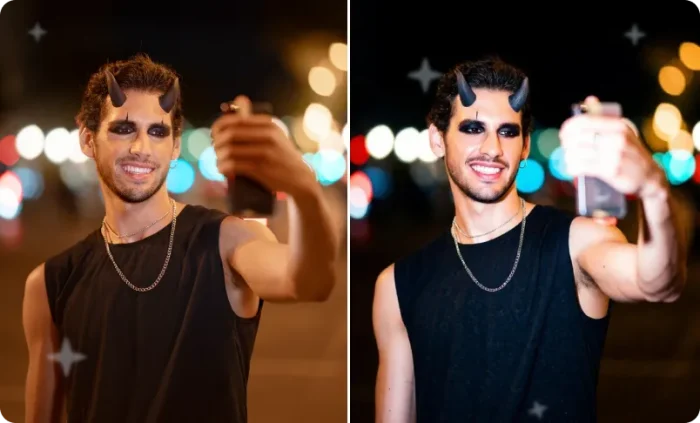
What Is the Instagram Flash Filter?
You’ve seen it everywhere. Someone posts a photo — dark background, face perfectly lit, that harsh flash hitting just right.
That’s the Instagram flash filter effect.
It’s a specific photography aesthetic that makes your photo look like it was taken by a paparazzi or a cinematic flash photographer. It’s raw, dramatic, and impossible to ignore.
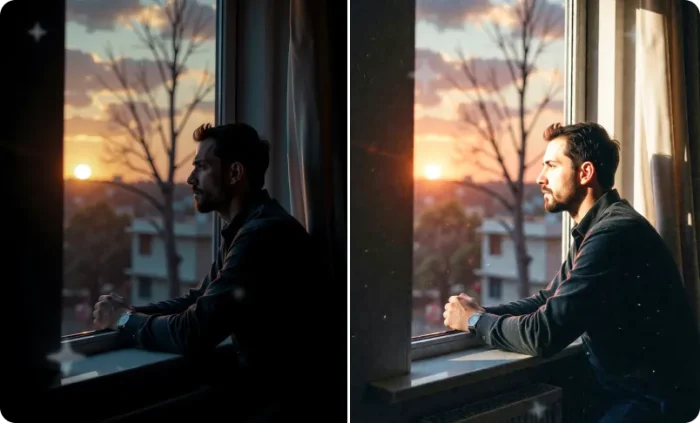
- Your face is sharply lit by a harsh frontal flash
- Your background goes almost completely dark, crushed to near-black
- Only neon signs, bokeh lights, and reflections survive behind you
- Your skin gets a cool tonal shift with teal-green in the shadows
- Film grain and noise effects are added across the whole image for texture
- Your face picks up natural flash highlights for a dewy, lit look
This look is rooted in two worlds — film photography and celebrity paparazzi shots.
Think of photos taken outside clubs in the early 2000s, fashion editorials, or behind-the-scenes concert photography.
Back then, direct flash was used out of necessity, but the result was accidentally iconic.💖
Now it’s back — intentionally. And AI can apply it to any photo you already have.
This blog gives you 10 AI flash photography, ready-to-copy prompts. Each is for every type of night photo you might have on your phone.
Upload your photo to LightX, Gemini, ChatGPT, or any AI image editor, paste the prompt, and watch the transformation happen.
10 Best Instagram Flash Filter AI Prompts [Copy & Use]
These prompts are built for 10 different night photo scenarios. Find the one that matches your photo, copy the prompt, and paste it into your AI tool.
One rule before you start: your photo should already be taken at night or in a dark setting like indoors, evening, or low light.
The AI flash filter works by darkening what’s already there and lighting you up. So if your photo was taken in bright daylight, the AI has very little shadow to work with, and the result will look flat.
Let’s dive in.
Prompt 1 — City Street at Night
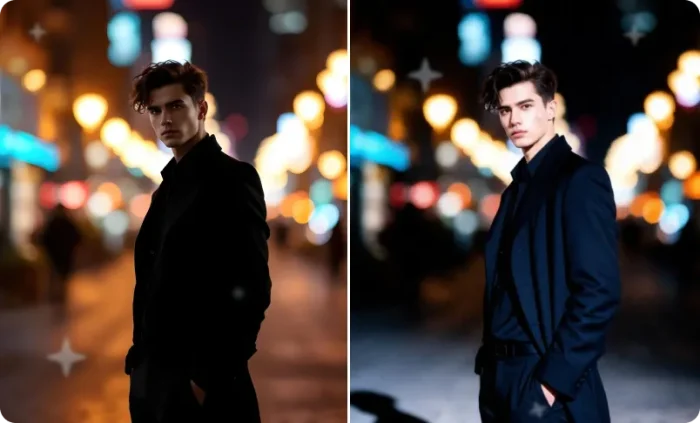
FACE AND IDENTITY MUST REMAIN COMPLETELY UNCHANGED. Apply a harsh early-2000s digital camera flash effect, strong direct front flash, bright white skin highlights, flat facial lighting, visible wall shadow behind subject, slight overexposure on face and dress, vintage Instagram digicam aesthetic, realistic hotspot from camera flash, soft grain, candid mirror selfie style.
Prompt 2 — For Photos in the Nightclub
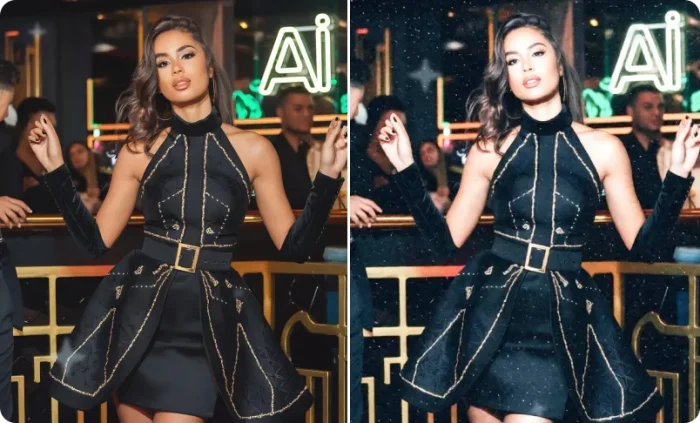
FACE AND IDENTITY MUST REMAIN COMPLETELY UNCHANGED. Apply a harsh compact camera flash effect, bright frontal flash lighting, overexposed skin highlights, sharp subject illumination, dark city background, visible flash shadow, vintage digital camera aesthetic, realistic candid night street photo, early 2000s Instagram style.
Prompt 3 — For Photos on the Rooftop
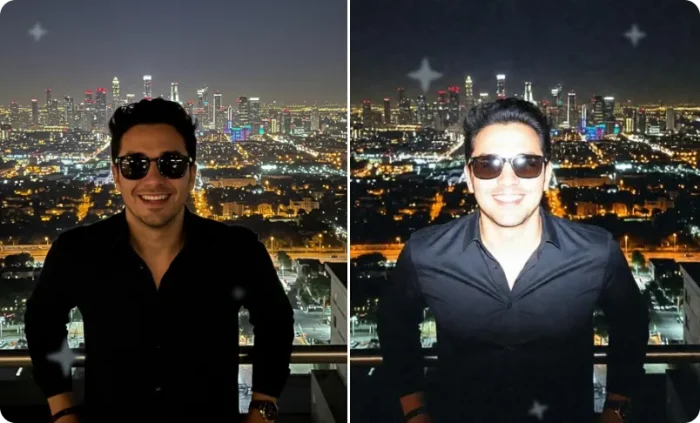
FACE AND IDENTITY MUST REMAIN COMPLETELY UNCHANGED. Add a strong direct flash from camera, bright washed highlights on skin, dark surrounding background, harsh flat lighting, visible reflective glow, vintage club photography aesthetic, realistic digital camera flash, early 2000s social media style.
Prompt 4 — For Mirror Selfies
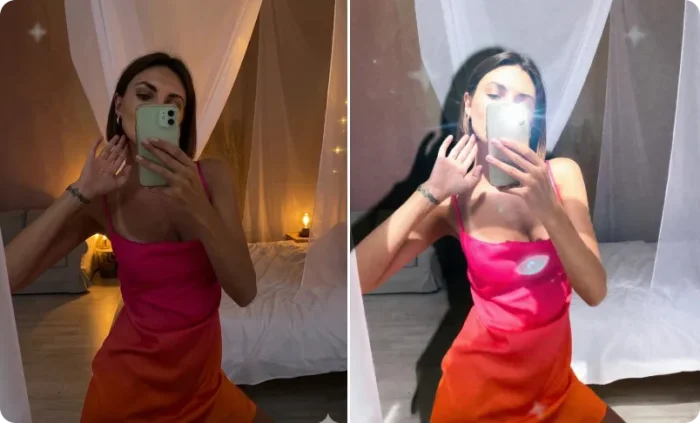
FACE AND IDENTITY MUST REMAIN COMPLETELY UNCHANGED. Create a harsh front flash effect, bright face illumination, strong white highlights, realistic flash hotspot, soft grain, shadow behind subject, dark rooftop background, nostalgic digital camera photo style.
Prompt 5 — For Photos Inside a Car
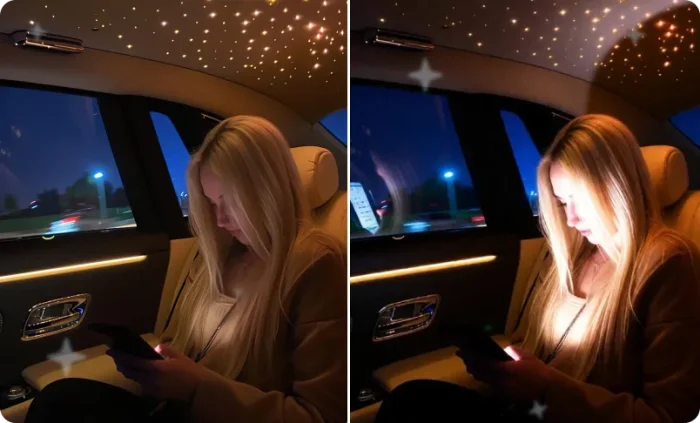
FACE AND IDENTITY MUST REMAIN COMPLETELY UNCHANGED. Apply old digital camera flash lighting, harsh direct flash on face, bright foreground exposure, reflective highlights on windows, dark interior preserved, realistic flash hotspot, vintage candid Instagram aesthetic.
Prompt 6 — For Photos in a Restaurant
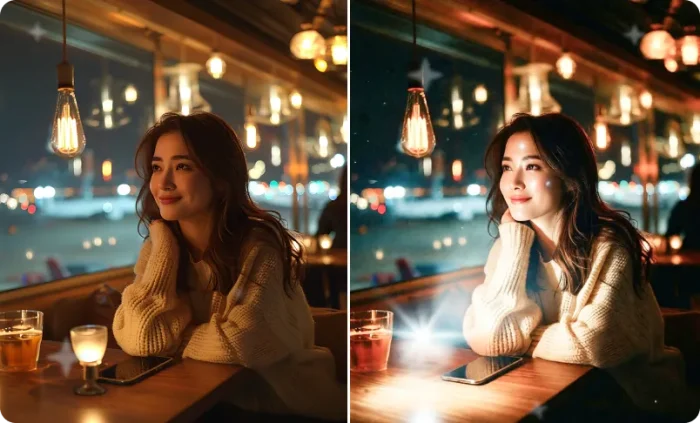
FACE AND IDENTITY MUST REMAIN COMPLETELY UNCHANGED. Add a compact digital camera flash effect, strong front flash, bright skin shine, slightly overexposed highlights, dark ambient restaurant background, realistic shadow depth, vintage social media photography style.
Prompt 7 — For Photos on the Beach / pool at Night
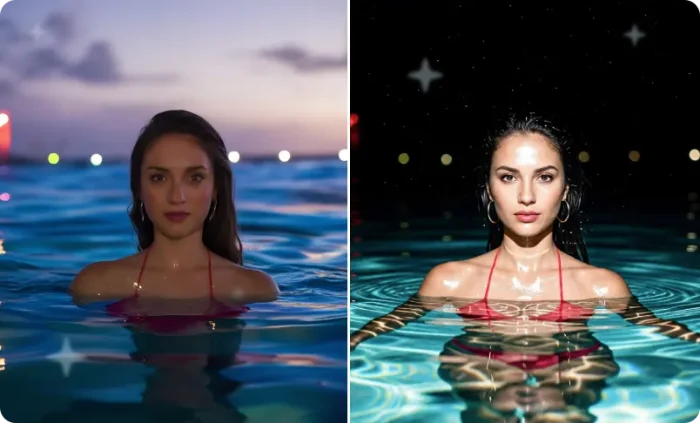
FACE AND IDENTITY MUST REMAIN COMPLETELY UNCHANGED. Apply direct flash photography effect, bright harsh frontal lighting, glossy skin highlights, reflective water glow, dark night background, realistic camera flash hotspot, vintage digicam aesthetic.
Prompt 8 — For Photos in a Concert / Festival

FACE AND IDENTITY MUST REMAIN COMPLETELY UNCHANGED. Create an old-school camera flash effect, harsh front lighting, overexposed highlights, dark crowd background, visible grain, candid nightlife photography, early Instagram flash aesthetic.
Prompt 9 — For Photos in a Dark Alley
FACE AND IDENTITY MUST REMAIN COMPLETELY UNCHANGED. Apply harsh point-and-shoot flash effect, bright frontal lighting, strong wall shadow, overexposed skin glow, dark alley preserved, vintage digital camera look, candid urban flash photography.
Prompt 10 — For Photos in a Room at Night
FACE AND IDENTITY MUST REMAIN COMPLETELY UNCHANGED. Add a harsh direct flash effect like an Instagram digicam filter, bright face illumination, flat lighting, visible wall shadow, slightly blown highlights, soft grain, nostalgic indoor digital camera photo style.
What Makes a Flash Filter Prompt Actually Work
A. Always Lock the Face First
This is the most important part of any prompt. Without it, AI models will smooth skin, alter features, or change expressions.
The phrase “KEEP THE FACE 100% UNCHANGED” written in caps signals the model to treat the face as untouchable.
It’s not a suggestion — it’s a command. Caps matter.
B. Background Destruction
The flash effect doesn’t work if the background stays bright. Every prompt tells the model to crush the background to near-black — exposing only isolated light sources. This is what makes the subject pop.
The technical term for this is “flash falloff.”
Light from a flash drops off rapidly with distance. The prompts replicate this physics in the AI edit.
C. Camera Language
AI image models are trained on photography metadata. When you say “f/2.8, 1/200s, ISO 800”, the model understands the exact exposure relationship that creates that look. It’s speaking the model’s native language.
- f/2.8 or f/4 — wide aperture, subject in focus, background falls away
- 1/160s–1/250s — shutter speed that kills ambient light and lets flash dominate
- ISO 800–1600 — adds grain while keeping the scene dark
- Canon Speedlite / Nikon SB-910 — specific flash units the model recognizes as harsh and direct
D. Define the Glow
There are two types of glow, and AI picks the wrong one by default.
When you say “flash,” most tools apply a soft beauty filter glow. It makes skin look blurred, dreamy, over-edited. That’s not what we want.
What we want is flash luminance. Your skin is supposed to look bright and alive because a harsh light is hitting it directly.
The prompts say “natural flash luminance” specifically to push the model toward the right one.
E. Environment
Teal shadows + cool flash + warm background lights = the specific color palette that reads as “flash photography” to both the AI and the viewer.
This isn’t random. It’s the exact color separation that appears in real flash photos and film photography.
How to Use These Prompts with AI
How to Use These Prompts with LightX
Getting from prompt to finished photo takes four steps.
- Open LightX and go to the Image-to-Image tool. Sign up if you haven’t; you get 5 free credits daily.
- Upload your photo. Night shot, low light, or indoor works best.
- Find your scenario from the list above and paste that flash filter AI prompt in the box.
- Hit Generate. Download if you love it.
Not happy with the result?
LightX has a “Change with AI” option that lets you fix specific things without regenerating the whole image. Just describe what you want changed, and it touches only that part. Way faster than starting over.
Want to take it further?
Once you have your base image, these LightX tools are worth exploring:
- Reshape Body: slim your figure, add height, and enhance your curves directly on the generated image
- AI Clothes Changer: swap the outfit using a text prompt
- Change Hairstyle: try a completely different hair look without touching the rest of the photo
- Reshape Face: sharpen your jawline, refine your nose, or add that lip filler look without filters
These tools will help you get a result that looks like what you usually only see on big influencer pages.
Before You Post — Read This
The flash filter effect is simple in theory but easy to mess up in practice. Here’s what separates viral results from mediocre ones.
Tips to Make It Go Viral
- Post it as a Before/After: Show the original photo first, then the flash edit. This format drives saves and shares more than any other.
- Add a reel transition: Cut between the original and the edited version at the beat drop.
- Simple backgrounds work best: A wall, a street, a car interior all work better than a crowded market.
- If you can, take the original photo with your phone flash already on. The AI detects better and the result looks more authentic.
Common Mistakes to Avoid
- Using a low-quality or heavily compressed image. We need AI to be able to see and work on every element in the photo.
- Uploading group photos. These prompts are built for a single dominant subject. Groups split the AI’s attention.
- Uploading daylight photos. The flash effect darkens the background, it doesn’t replace it. If your background is a bright white wall in daylight, results will be limited.
Your job is just to find the right photo, pick the right prompt, and hit generate.
The rest takes care of itself.
⚡ Now go make something worth posting. ⚡
