Make Image Background Transparent in Seconds!
11 min readPublished on: Mar 11, 2022
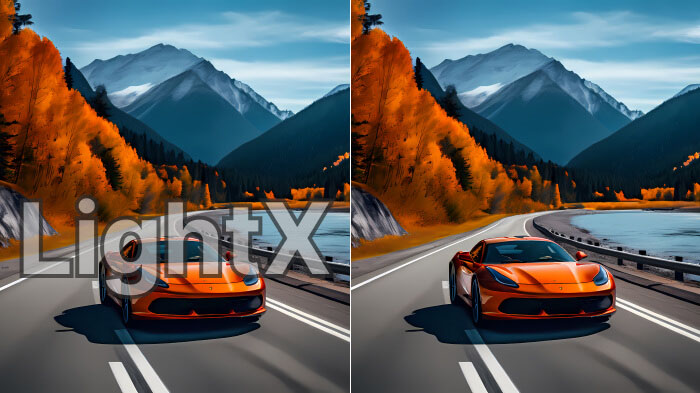
Remove Background OnlineEdit Now
If you have been wondering how to make a transparent background in your images easily, quickly, and effectively, then you have come to the right place.
With LightX mobile photo editor and its AI-enabled advanced tool, you can make a picture’s background transparent and edit it further as you like in a snap!
From learning the making of a transparent background to knowing its usage, we will address everything around the transparent background as different sections ahead in this blog.
Keep scrolling to discover!
A Transparent Background – Overview
In order to know the steps to turn your photo’s background transparent, let us first establish a basic understanding of it.
What is a Transparent Background in an Image?
When an image is said to have a transparent background, it implies that there is only a clear subject or object in the image without any background surrounding it. Whatever effect, color, pattern, texture, or design you add behind that subject or object later, it becomes the new background.
The image below is a visual example of the same.
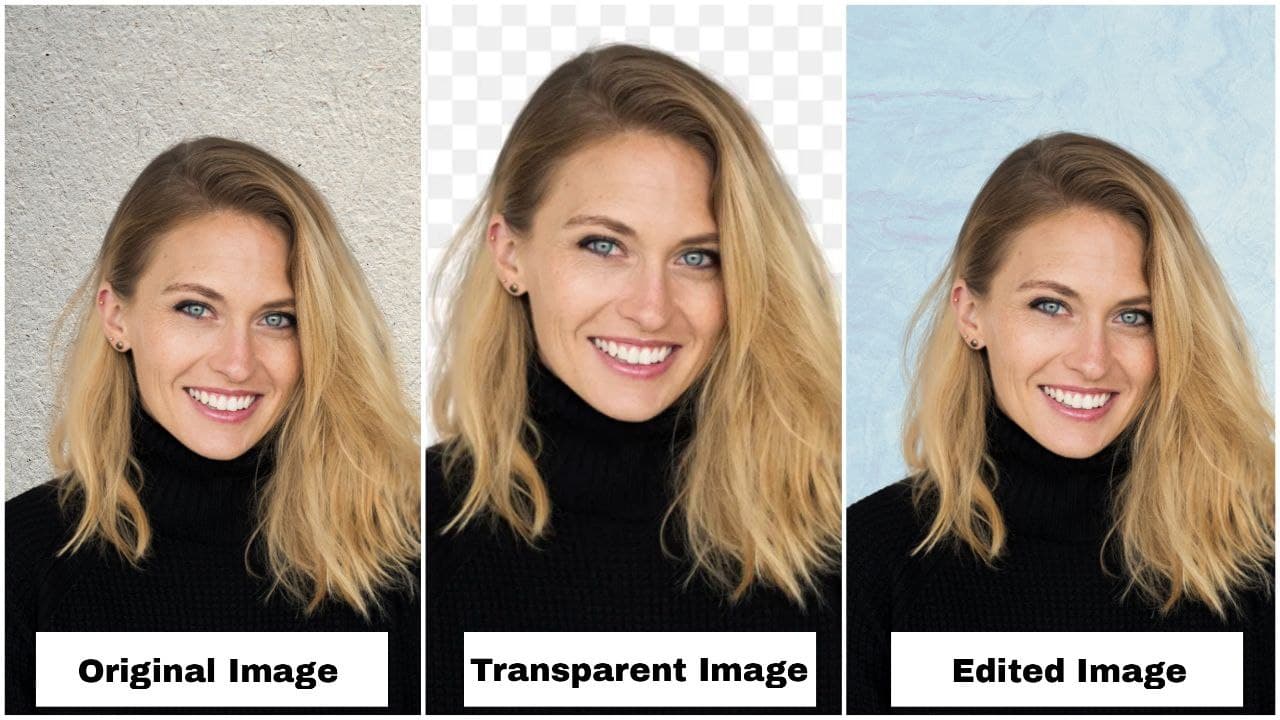
Technically speaking, an image with a transparent background has nothing in its background pixels. This lets whatever you put behind the foreground of the image show through.
Why You May Need a Transparent Background?
Just imagine for a second, you have clicked one breathtakingly beautiful picture. But then the background or any undesirable part of it comes under notice and changes the whole perspective. Or you have become tired of clicking pictures around the same old background.
Not fun, right?
Here comes the transparent background in the play. When you delete the existing and unwanted background from your image, the image becomes transparent. You can then add any other desired and more suitable background over the transparent background. You can be as imaginative and creative as you want!
How to Make a Transparent Background?
Making a transparent background may sound like a lot of work. But, with LightX’s transparent bg maker, it’s a tremendously easy and instant process of a few simple steps. You can turn even the hardest backgrounds or the most difficult elements in it transparent in a matter of a few seconds only.
The steps you need to follow to make any image have a transparent background using LightX are:
1: Open the LightX iOS or LightX Android app on your device.
2: Select a picture to edit either from your device’s library or from stock. You can also click a photo right away if you don’t have any already by tapping on the ‘Camera.’
3: Click on ‘Edit,’ go to the ‘Creative’ category, and tap on the ‘Eraser’ tool.
4: Now, use the ‘Erase,’ ‘Magic Erase,’ ‘Brush,’ or ‘Magic Brush,’ options to delete or restore the background in your image as required.
5: As you have finished removing the background, move ahead and crop the image if needed. Done with cropping, move ahead and choose ‘Transparent’ as the background.
6: Once done, click on the checkmark icon. To save your image with transparent background to your device, click on ‘Export’ at the top right of the screen. Make sure to choose the ‘PNG’ format, followed by setting the desired resolution. Done with that, click on ‘Save.’ Your image will be downloaded and saved to your device. You can also share it right away across different social media platforms by clicking on the ‘Share’ option.
And that’s how easy it is to make image background transparent with LightX! In just a few clicks, you can delete the background from an image perfectly!
How to Make a PNG Transparent?

If you notice, we mentioned the ‘PNG’ format while exporting your edit in the steps mentioned above.
The ‘PNG’ format plays a significant role when it comes to an image with a transparent background. The two go hand-in-hand!
A PNG (Portable Network Graphic) file is a raster graphics file format supporting lossless data compression. It supports the transparency in an image. Due to this, it is used popularly in web designs, logos, flat images, icons, etc.
If you wish to customize your PNG file further and save it again as a PNG, you can do so effortlessly with LightX. Simply follow the exact steps stated in the previous section, and you are good to go!
How to Make a JPEG Transparent?

‘You can make JPEG image transparent, but you can not have a transparent JPEG image.’
Did you get it in the first go? Or are there any clouds of confusion?
Well, whatever might be the case, here we simplify the statement for you – If you have an image in the JPEG format, you can very easily make it transparent. But once it is edited and has a transparent background, you need to export it in PNG format. It is important for an image with a transparent background to be exported in a format supporting the transparency. PNG is one of those formats. If you export the image in JPEG format, the previously applied transparent background will turn to a black or white background. Not only this won’t help your objective, but your effort, as well, will go into vain!
LightX, in this case, supports the PNG format. It lets you turn image into transparent png in order to maintain the transparency of the background. To make your JPEG image transparent in LightX, you need to follow the exact same steps mentioned above.
Once you have successfully edited your JPEG image with a transparent background and saved it as a PNG file, you can further utilize it for a variety of creative or branding edits.
How Do You Take the Black and White Background Out of a Picture?

There can be times when you may unknowingly or unintentionally export your transparent image in JPEG format. This won’t support the transparency and lead to a black or white background instead. Or, you may generally have a photo with a black or white background you wish to get rid of.
Whatever may be the situation, you can clear the black or white background in seconds with LightX.
All you have to do is repeat the exact steps for making the background transparent as stated earlier. The transparent png image will get saved to your device without any black or white background attached to it.
How to Put a Transparent Image Over Another Image?
Now that you know how to make a transparent background in your images, it’s time to learn how to put your transparent png file onto another image with LightX.
Once you have created your perfect and desired transparent image, it acts as a sticker, which you can add to any other image of your choice. Doing so is just smooth and seamless with LightX editor. You can have a transparent background in any photo, save it as a sticker, and utilize it further for a wide range of incredible edits. You can draw on photos, add text, and more!
In LightX, you can put your transparent image over another image in two different ways. Let’s get to know each one by one.
While clearing the background using the ‘Eraser’ tool
You can put your transparent image on another image just after clearing the background. In this case, you don’t have to save it as a sticker. You can have another background right away. The steps to do the same are as follows:
1: Open the LightX iOS or LightX Android app on your device.
2: Select a picture to edit either from your device’s library or from stock. You can also click a photo right away if you don’t have any already by tapping on the ‘Camera.’
3: Click on ‘Edit,’ go to the ‘Creative’ category, and tap on the ‘Eraser’ tool.
4: Now, use the ‘Erase,’ ‘Magic Erase,’ ‘Brush,’ or ‘Magic Brush,’ options to delete or restore the background in your image as required.
5: As you have finished removing the background, move ahead and crop the image if needed. Done with cropping, move ahead, and instead of choosing a transparent background, click on ‘Image’ to add an image either from stock, your device’s library, or camera right away as the background. The image will get added as the new background automatically. You can also fill any solid color as the background. To do it, click on ‘Color’ after you are done cropping.
6: Once done, click on the checkmark icon. To save your image with transparent background to your device, click on ‘Export’ at the top right of the screen. Make sure to choose the ‘PNG’ format, followed by setting the desired resolution. Done with that, click on ‘Save.’ Your image will be downloaded and saved to your device. You can also share it right away across different social media platforms by clicking on the ‘Share’ option.
Using your transparent png sticker later or anytime in future
If you don’t want to put your transparent image on another background then and there, you can save it as a PNG sticker to your device. You can then put it on another picture later anytime you like or require. The steps to do it using LightX transparent maker free on your phone are as follows:
Part 1: Creating a Transparent Image
1: Open the LightX iOS or LightX Android app on your device.
2: Select a picture to edit either from your device’s library or from stock. You can also click a photo right away if you don’t have any already by tapping on the ‘Camera.’
3: Click on ‘Edit,’ go to the ‘Creative’ category, and tap on the ‘Eraser’ tool.
4: Now, use the ‘Erase,’ ‘Magic Erase,’ ‘Brush,’ or ‘Magic Brush,’ options to delete or restore the background in your image as required.
5: As you have finished removing the background, move ahead and crop the image if needed. Done with cropping, move ahead and choose ‘Transparent’ as the background.
6: Once done, click on the checkmark icon. To save your image with transparent background to your device, click on ‘Export’ at the top right of the screen. Make sure to choose the ‘PNG’ format, followed by setting the desired resolution. Done with that, click on ‘Save.’ Your image will be downloaded and saved as a sticker to your device.
Part 2: Adding Transparent Image to Another Image
1: Open the image, design, pattern, texture, etc., you want as the new background in the LightX app on your device. Go to the ‘Mixing’ category and click on the ‘Blend’ tool.
2: As the library opens up, select the transparent PNG sticker from the LightX folder by tapping on it. It will get added automatically to your new background. And once it is added, place it as you want on the image, along with choosing a suitable blending effect.
3: All done with putting your transparent image on another image, click on the checkmark icon. Now, save your edit to your device by tapping on ‘Export’ at the top right of the screen. Choose the desired image format and resolution and click on ‘Save.’ Your image will be downloaded and saved to your device. You can also share it right away across different social media platforms by clicking on the ‘Share’ option.
How to Use Transparent Images?
We have made achieving images with transparent background the simplest for you with LightX editor. You can create the transparent backgrounds just like professionals.
You must be wondering where and how to actually use them now!
Well, let us simplify this, as well, for you!
You can utilize your transparent png files for a wide range of creative, professional, and branding purposes. To name a few, you can use transparent images for creating logos, fun or fictional artworks, or as subject or object stickers, transparent text images for product or marketing graphics, and much more!
Get Transparent Images in a Few Clicks With LightX
Now that you know it all about how to make a transparent background in your images and have the best editor, LightX, to work with, get started today!
Clear the background easily and seamlessly from an image and edit it further as you want for awesome edits!
Remove Background OnlineEdit Now